Tuesday, August 14, 2018

Sunday, August 5, 2018
Yeah. It's been awhile
So It's August, and we have a lot to catch up on.
The depression monster has been making life difficult for a couple of months, but we've also been pretty busy over here.
In June I took a trip to Illinois with my dad and older brother to visit the hometown and see old friends. I hadn't been back in 18 years, and after the loss of my son my dad felt it would be good for all of us to go back home and reconnect with our old friends and also spend some quality time together. I don't get to see my family very often as we live so far apart.
After I returned, we finally gained some forward momentum on our project. I have taken a break from the goats because I just have been struggling for awhile. She e mailed me a couple of weeks after I began my hermiting, and wanted to give me the name and number of a friend of hers who is an architect. We had been having so much trouble sorting out drawing stuff.
As it turns out, her friend used to work at the planning department and was the person I had spoken to back when I first tried to pull permits. She had left the planning department and struck out on her own. So she has worked the past couple of months to try and get us what we need and want in the house. I'm pleased to announce that we have drawings in our possession! She even met with the planning department already to go over the drawings to help us get them through. I have everything filled out, and now I just need to get some copies made of a couple of things and then drum up the funds to pull the permits! Once we file those, it's go time! So guys! We're getting ready to get the house delivered! We're getting ready to build!!!!
*lots of crazy screeching*
We are finally moving forward. We are down to 7 months to get this place finished. It's going to be down to the wire.
Tuesday, May 22, 2018
Side Projects
While I'm doing administrative stuff (poorly) for the build, I am also working on a side project or two in the meantime to begin my hands on time with some tools and learn a whole bunch of stuff. I say poorly because my mental state has been a bit scattered after our loss in December, and I've just been doing a shit job of pulling myself back together enough to really focus on the crap that I NEED to do and just do it. Instead, anxiety and sadness are whittling away at the fucks I had to give. So, perhaps a little TMI for this audience, but I'm feeling guilty that we're kind of stalled out at the moment, and this process has been emotional in its own right without the added heaviness that comes with dealing with the losses that we have over the past few years, and I'm in this place where I am just sharing my feelings in an effort to just move past them and keep moving in a forward direction. So anyhoo, that's not why I was here to post. I was here to post about the teepee side project and the upcoming compost bin side project. In my previous post, I had linked to a video from a day that I had been working on skinning logs. I'm still doing this.
Actually, over the weekend it turned into assessing the entire project again. Basically, this has just been my project. I got a wild hair and decided that I need outdoor sleeping accommodations, and instead of being normal and just putting up a tent, I've gone mental and decided I need to build a larger structure. Why? Glamping? I joke and say glamping, but the reality is that I'm a very large woman with some annoying health stuff that makes regular old camping just not possible. If I get down on the ground there's always a chance that I'm not getting back up off of the ground without assistance. So I wanted something that I could put what initially was planned as a cot into and maybe a little side table and a little camp chair to sit in... I really could just make a large medieval style pavilion such as a friend of mine had discussed with me during this process, but I really do want to just DO something. So it became a tipi and a rope bed and maybe some camp furniture. I'm going to go back and forth between teepee and tipi until I figure out which one is actually appropriate to what the hell I'm doing, because I don't actually know yet.
So, I started out here. Mother Earth News Plains Tipi plans, and also WikiHow for plans. My initial research was ridiculously light before I went full tilt. A novice mistake, for I am eager. After a couple days of wrecking myself a bit, and a week and a half of migraine as a result, I have made the wise decision to take a breath, and dig into this a little more. Also in my initial search, I found this company, who had a fantastic video to get me all fired up for this, and also made me wonder whether I should save up the money and purchase the tipi cover, or if I want to learn to sew and do the entire thing myself. I don't know how to sew, so I think that just about everything that I'm doing on this project is brand new to me.
So that's where I was. Now let's go to where I'm at in the process now. Over the weekend, I went to do some work on the poles, and to pick the brain of my dear partner, whom I lovingly call "MikeGyver", about my setup. The jaw horse that I'm using is too heavy and I get a headache when I have to unload/load into the vehicle. So we're discussing a few options including just dragging it to a location where we can just leave it set up so I don't have to worry about loading and unloading it, using saw horses, and creating some other sort of semi-permanent setup for me to process stuff. I am also clumsy, so the kinds of things that we have to think about when setting up something is how to make it "Ali-resistant" and also "Ali-Safe".
This means basically that I am a human wrecking ball, and I also fall down a lot. So we consider those things along with whether or not it can be set up in a way that I am able to do it, or if we have to consider this a task that is simply not sensible for me to wreck myself doing. I'm all about self empowerment and setting out to prove to yourself that you CAN accomplish this monumental task, but I'm at a point in my life where just because I can push myself well past my comfort zone doesn't really mean I should. I have to be smart. I don't want to seriously injure myself because I was too stubborn to just ask for help, and also it's OKAY to ask for help. Just because I want to do this entire thing all by myself doesn't mean that it's going to happen that way, and why should it?
Yet none of that is really any of your concern, but I figure since this is a new blog perhaps a little background info so you can get to know us a bit and kind of see why we may do some of the things that we do. In the process of helping me, he lopped off the really rough ends of logs and some were a bit too soft for what we needed so we cut some down a bit, and somewhere in this process I realized that I'm not sure how long or how thick any of this is supposed to be, so I ran back to the house and internet to look at the various plans and look at the tipi website that I was pondering ordering from and I realized that first and foremost I needed to settle on a size because all of these things were different sizes. The mother earth plans are for an 18 1/2 foot tipi, and the ones we were looking at to purchase were 14 feet. We settled on 14 feet. I looked up the size of the poles from the website where you can purchase the tipi because you do have the option of doing your own poles, and then I went back to measure my poles and a couple are short by a foot or just dead on so there's no room to do any shaving and stuff. I'm also realizing I'll need to mark the poles and some will need to be trimmed down a bit, plus I need to get more. I'm worried about using standing dead and fallen because it looks like green wood may be better in this application. So I'm back online and researching now. I started out by being a complete moron and googling tipi plans for 14 foot tipis, and realized that the plan is basically the same freaking plan, it's just doing some math to change the dimensions. At this point, I'm on this website doing some research and a little more careful planning. I found yet another tool I'm going to be purchasing soon for my personal tool box. This will be a nice, long tape measure. My current one is 16 feet. My poles are supposed to be about 20 feet. I'm not saving tons of time by having a longer tape measure, but it's going to keep me more sane. I'm still debating whether or not to learn to sew and sew my own or purchase one of those ridiculously gorgeous tipis that they have for sale and just doing the poles. I haven't had a single person who thinks I should sew it myself, which in a way makes me want to do it myself even more, but I also want to sleep in it this year.
So that's where I'm at. Doing some more research, gathering more logs, skinning the ones that will definitely work, and going over my options for the tipi project. I think we're just going to stick with the tipi spelling, it feels right.
As far as camp furniture goes, I've been looking at some rope bed stuff here, and some general information on furnishing a period encampment. Obviously it's not the same period and I'm doing a bit of a mash up, but I am not going full SCA on anything. I want a functional space, an opportunity to try a handful of new things, and an end result that is going to work for what we need.
Thanks for reading!
Actually, over the weekend it turned into assessing the entire project again. Basically, this has just been my project. I got a wild hair and decided that I need outdoor sleeping accommodations, and instead of being normal and just putting up a tent, I've gone mental and decided I need to build a larger structure. Why? Glamping? I joke and say glamping, but the reality is that I'm a very large woman with some annoying health stuff that makes regular old camping just not possible. If I get down on the ground there's always a chance that I'm not getting back up off of the ground without assistance. So I wanted something that I could put what initially was planned as a cot into and maybe a little side table and a little camp chair to sit in... I really could just make a large medieval style pavilion such as a friend of mine had discussed with me during this process, but I really do want to just DO something. So it became a tipi and a rope bed and maybe some camp furniture. I'm going to go back and forth between teepee and tipi until I figure out which one is actually appropriate to what the hell I'm doing, because I don't actually know yet.
So, I started out here. Mother Earth News Plains Tipi plans, and also WikiHow for plans. My initial research was ridiculously light before I went full tilt. A novice mistake, for I am eager. After a couple days of wrecking myself a bit, and a week and a half of migraine as a result, I have made the wise decision to take a breath, and dig into this a little more. Also in my initial search, I found this company, who had a fantastic video to get me all fired up for this, and also made me wonder whether I should save up the money and purchase the tipi cover, or if I want to learn to sew and do the entire thing myself. I don't know how to sew, so I think that just about everything that I'm doing on this project is brand new to me.
So that's where I was. Now let's go to where I'm at in the process now. Over the weekend, I went to do some work on the poles, and to pick the brain of my dear partner, whom I lovingly call "MikeGyver", about my setup. The jaw horse that I'm using is too heavy and I get a headache when I have to unload/load into the vehicle. So we're discussing a few options including just dragging it to a location where we can just leave it set up so I don't have to worry about loading and unloading it, using saw horses, and creating some other sort of semi-permanent setup for me to process stuff. I am also clumsy, so the kinds of things that we have to think about when setting up something is how to make it "Ali-resistant" and also "Ali-Safe".
This means basically that I am a human wrecking ball, and I also fall down a lot. So we consider those things along with whether or not it can be set up in a way that I am able to do it, or if we have to consider this a task that is simply not sensible for me to wreck myself doing. I'm all about self empowerment and setting out to prove to yourself that you CAN accomplish this monumental task, but I'm at a point in my life where just because I can push myself well past my comfort zone doesn't really mean I should. I have to be smart. I don't want to seriously injure myself because I was too stubborn to just ask for help, and also it's OKAY to ask for help. Just because I want to do this entire thing all by myself doesn't mean that it's going to happen that way, and why should it?
Yet none of that is really any of your concern, but I figure since this is a new blog perhaps a little background info so you can get to know us a bit and kind of see why we may do some of the things that we do. In the process of helping me, he lopped off the really rough ends of logs and some were a bit too soft for what we needed so we cut some down a bit, and somewhere in this process I realized that I'm not sure how long or how thick any of this is supposed to be, so I ran back to the house and internet to look at the various plans and look at the tipi website that I was pondering ordering from and I realized that first and foremost I needed to settle on a size because all of these things were different sizes. The mother earth plans are for an 18 1/2 foot tipi, and the ones we were looking at to purchase were 14 feet. We settled on 14 feet. I looked up the size of the poles from the website where you can purchase the tipi because you do have the option of doing your own poles, and then I went back to measure my poles and a couple are short by a foot or just dead on so there's no room to do any shaving and stuff. I'm also realizing I'll need to mark the poles and some will need to be trimmed down a bit, plus I need to get more. I'm worried about using standing dead and fallen because it looks like green wood may be better in this application. So I'm back online and researching now. I started out by being a complete moron and googling tipi plans for 14 foot tipis, and realized that the plan is basically the same freaking plan, it's just doing some math to change the dimensions. At this point, I'm on this website doing some research and a little more careful planning. I found yet another tool I'm going to be purchasing soon for my personal tool box. This will be a nice, long tape measure. My current one is 16 feet. My poles are supposed to be about 20 feet. I'm not saving tons of time by having a longer tape measure, but it's going to keep me more sane. I'm still debating whether or not to learn to sew and sew my own or purchase one of those ridiculously gorgeous tipis that they have for sale and just doing the poles. I haven't had a single person who thinks I should sew it myself, which in a way makes me want to do it myself even more, but I also want to sleep in it this year.
So that's where I'm at. Doing some more research, gathering more logs, skinning the ones that will definitely work, and going over my options for the tipi project. I think we're just going to stick with the tipi spelling, it feels right.
As far as camp furniture goes, I've been looking at some rope bed stuff here, and some general information on furnishing a period encampment. Obviously it's not the same period and I'm doing a bit of a mash up, but I am not going full SCA on anything. I want a functional space, an opportunity to try a handful of new things, and an end result that is going to work for what we need.
Thanks for reading!
Wednesday, May 9, 2018
Adventures at the Ranch
The leaves are beginning to emerge on the aspen trees, and it's time to begin some outdoor projects.
We started by digging up some of the "buried treasure" that we stumbled across.
It's very long and boring. I sped it up as fast as I could at the time and added music as requested by my miláček, but it's still long and boring. You can view it here on YouTube.
Next video is a portion of footage that I shot yesterday while peeling bark from a log. I am wanting an outdoor sleep space this summer, and so there's no better way than to do it yourself! So I looked around at a few options and opted to go for a teepee. It gives me an opportunity to get my hands on some woodworking tools and begin to learn some basic concepts for the upcoming build, and it's not crazy complicated. This footage was shot for teepee footage, but was painful to wade through for that purpose. I am a person who likes to pretend everything is normal, even when it's not. I have a bunch of auto immune disorders, and on top of that I have a bunch of back pain, and a headache for more than 4 years. This video is basically a giant episode of pain, but I REALLY wanted to get through a log yesterday and was super determined. It's on high speed for most of it, but I let it run at regular speed for the last couple of minutes. This is what digging deep looks like. This is what trying to suck it up and "fight through it" looks like. I'd say 98% of the time I don't look sick. I look like a totally normal person, but I am in pain ALL the time. Most of the time it exists as a sort of background noise. This particular episode was the headache being it's asshole self. If I bend over too much it just means an instant migraine. Once I get all of the logs peeled, I'll post a final video for that portion of the project, but this was just a reminder that I am a human being and not perfect. I must be more gentle with myself. So watch that video here on YouTube.
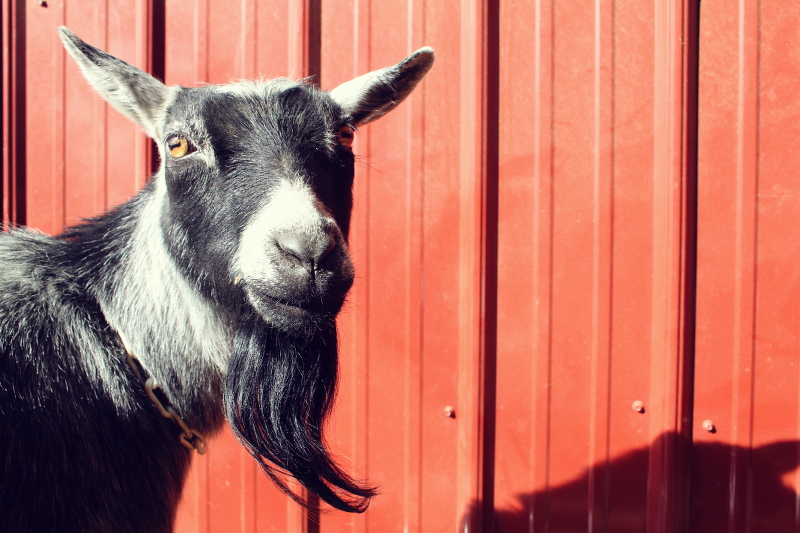
And lastly, I've been hanging out with a whole bunch of goats lately. Goat milk soap has been happening a lot, which you can buy from my Etsy shop, and I just love my time with these goofballs. We've been keeping busy and have a lot of projects coming up soon so stay tuned!


We started by digging up some of the "buried treasure" that we stumbled across.
It's very long and boring. I sped it up as fast as I could at the time and added music as requested by my miláček, but it's still long and boring. You can view it here on YouTube.
Next video is a portion of footage that I shot yesterday while peeling bark from a log. I am wanting an outdoor sleep space this summer, and so there's no better way than to do it yourself! So I looked around at a few options and opted to go for a teepee. It gives me an opportunity to get my hands on some woodworking tools and begin to learn some basic concepts for the upcoming build, and it's not crazy complicated. This footage was shot for teepee footage, but was painful to wade through for that purpose. I am a person who likes to pretend everything is normal, even when it's not. I have a bunch of auto immune disorders, and on top of that I have a bunch of back pain, and a headache for more than 4 years. This video is basically a giant episode of pain, but I REALLY wanted to get through a log yesterday and was super determined. It's on high speed for most of it, but I let it run at regular speed for the last couple of minutes. This is what digging deep looks like. This is what trying to suck it up and "fight through it" looks like. I'd say 98% of the time I don't look sick. I look like a totally normal person, but I am in pain ALL the time. Most of the time it exists as a sort of background noise. This particular episode was the headache being it's asshole self. If I bend over too much it just means an instant migraine. Once I get all of the logs peeled, I'll post a final video for that portion of the project, but this was just a reminder that I am a human being and not perfect. I must be more gentle with myself. So watch that video here on YouTube.
And lastly, I've been hanging out with a whole bunch of goats lately. Goat milk soap has been happening a lot, which you can buy from my Etsy shop, and I just love my time with these goofballs. We've been keeping busy and have a lot of projects coming up soon so stay tuned!


Tuesday, February 6, 2018
It's been a while.
Things have been quiet at the ranch over winter. It's been pretty chilly, so outdoor tasks have been things like dragging in firewood, and splitting wood to season. We suffered a major loss in December with the death of my oldest son. As the days slowly begin to lengthen towards spring, I begin to emerge from under the shadow that has been over me since then. I've been tending to a sick kitty for the past week who is finally out of the woods and on the mend, and yesterday I had my very first opportunity to milk a goat. I am looking forward to repeating the experience and getting to know more about those amazing and fascinating critters. Several batches of goat milk soap will be forthcoming in my Etsy shop as a result of my efforts. I look forward to sharing more goat adventures with you in the future. A woman in the neighborhood has goats and was looking for assistance in milking them, and I volunteered. I just want to try new things and start figuring out what makes sense for our property in the future.
I also had a photo shoot with a client yesterday down in Denver, and stumbled upon some photos from around Thanksgiving that I hadn't pulled off of the camera until today. I thought I would share those with you. We love the deer that come around to say hello. They are so beautiful and I could sit and watch them for hours. They bed down on the hillsides all around the house and are always fascinated by the dogs. So here are a couple of the deer.


William loved the deer and many of the animals here made themselves known to him. He often took time to hang out by the little spring and ponds, watching the animals and enjoying the stillness of the forest. I was looking forward to having him join us in building the house and starting his life up there, but he was taken too soon. I dedicate this post and so many of my adventures to both he and my other son, Arden. They are the biggest adventure that I have embarked on in my life, and my most rewarding one. I love my boys. I will miss my gentle giant.


Wednesday, November 22, 2017
Soil Testing!
Soil testing came back and our build site is a go! HOORAY! Now we just have to get with Arched Cabins and get our drawings done, get permit paperwork squared away, and then go pull permits for our build site! Finally beginning to move forward. I just want to have everything in place so we can get those holes drilled and foundation done and get this show on the road!
So what happens now? With the soil test we have to drill all of our holes for our foundation (post and pier foundation is what we are using for the house) and then we will likely use a block skirting around that. Once the holes are drilled, we have to have someone come out to inspect the open holes before we pour concrete, and then I believe the pillars have to be inspected, but don't quote me on that yet. The soil report was around $950, they pulled 2 core samples to send off to the lab, and we got a full workup and recommendations on the foundation design based on the post and pier foundation.
Always read your report carefully, and find out exactly what kind of testing they do. We pretty much wasted $650 on the first test at the site where the house currently sits. The guy didn't take any core samples, and he just eyeballed the hole. We could probably get away with using it to put down something else up there, but I don't think we'd get the permits pulled in time for a second house. We do plan to put a cabin somewhere eventually for Mike's mom to come and stay in whenever her heart desires...
When we got this report, they did it for the wrong foundation type, so it took a couple of extra weeks to get that all sorted out. I'm just waiting for Mike to do a quick mockup of a floor plan to send off to Arched Cabins. It will be another $800 for the engineered floor plans and full foundation plans that the county requires. Eventually I will have a breakdown of costs. I just need to sort out a few things with my excel skills. AKA I have no excel skills and I need to sit down and watch some tutorials and such.
So what happens now? With the soil test we have to drill all of our holes for our foundation (post and pier foundation is what we are using for the house) and then we will likely use a block skirting around that. Once the holes are drilled, we have to have someone come out to inspect the open holes before we pour concrete, and then I believe the pillars have to be inspected, but don't quote me on that yet. The soil report was around $950, they pulled 2 core samples to send off to the lab, and we got a full workup and recommendations on the foundation design based on the post and pier foundation.
Always read your report carefully, and find out exactly what kind of testing they do. We pretty much wasted $650 on the first test at the site where the house currently sits. The guy didn't take any core samples, and he just eyeballed the hole. We could probably get away with using it to put down something else up there, but I don't think we'd get the permits pulled in time for a second house. We do plan to put a cabin somewhere eventually for Mike's mom to come and stay in whenever her heart desires...
When we got this report, they did it for the wrong foundation type, so it took a couple of extra weeks to get that all sorted out. I'm just waiting for Mike to do a quick mockup of a floor plan to send off to Arched Cabins. It will be another $800 for the engineered floor plans and full foundation plans that the county requires. Eventually I will have a breakdown of costs. I just need to sort out a few things with my excel skills. AKA I have no excel skills and I need to sit down and watch some tutorials and such.
Thursday, November 2, 2017
Giant Batch of Spicy Tomato Sauce - Recipe

Hey guys! Today I'm making a gigantic batch of tomato sauce. It didn't start out that way, but I always cook too much food, so I will likely can a whole bunch of this. I started with a basic recipe I found and as usual added my own flair. I like stuff spicy, so it has some heat (totally optional) and I roasted the peppers right on the stove burner for that amazing roasted taste. If you've never roasted your peppers before, I highly encourage you to try it. It adds so much flavor to your peppers.
Basically you can fire up the grill or just turn on the burner on your stove if you have a gas stovetop (our stove is fueled via the giant tank of propane outside).
Just roast the peppers over the flame until the skin is BLACK. Stuff the peppers into a bag and seal for about 10 minutes, put on a pair of gloves to save the "AAAAAH I TOUCHED MY EYE AND IT BURNS" issues down the road if you're cooking your more spicy peppers. I use Anaheim because they add a wonderful flavor to dishes without ridiculous amounts of heat.
I think this batch had 3 1/2-4 lbs of tomatoes, but I went with it. Anyhoo, onto the recipe.
3 lbs (roughly) tomatoes
2 medium red peppers
1 Anaheim chile pepper (larger than jalapeños and lighter green)
2 sweet yellow onions
optional veggies - carrots. I forgot to buy some
2, 12 oz cans of tomato paste
2 tablespoons of butter or ghee (which is a clarified butter that you just brown a bit more)
4 cloves of garlic, minced
1 tsp celery salt (optional a stalk of celery, but I didn't have any)
1 tablespoon Italian seasoning (to taste really)
1 tablespoon chili powder (to taste)
4 bay leaves
splash of creole seasoning (optional)
1 tsp Pink Himalayan Salt
1 cup of red wine (optional)
1 beef bouillon cube (I actually use something that's called better than bouillon or those creamer size packets of concentrated beef stock as they have a much richer flavor) this is also clearly optional for those of you who are vegetarian or vegan.
In a large stock pot, boil several quarts of water. Have close by a large bowl filled with ice water. You will drop a few tomatoes into the boiling water for approximately 1 minute. Boil the tomatoes until the skin starts to peel, then remove with a slotted spoon and dunk into the ice bath until cool enough to handle. Peel the skins (awesome for the compost bin) and squeeze out the seeds, at this point I also cut off the bit that was attached to them stem and set aside. Save 8 tomatoes (also peeled and seeds removed) to cube later. With the rest of the tomatoes, run through a food processor or blender and pour into crock pot or large soup pot and set aside.
Slice the onions and peppers into the size of your liking. In a large frying pan, melt the butter or ghee, you may also add some olive oil to the mix. Melt the butter in the pan, and stir in your onion and pepper mix as well as your diced garlic and carrots if you opted to toss those into your mix. Cook until onions are translucent and beginning to brown.
Add tomatoes, vegetables, spices, and wine into your crock pot or large pot on the stove, and cook for 4 hours. After 2 hours, stir in the 2 cans of tomato paste.
Stir occasionally and spice to your taste as you are cooking.
When you are done, remove the bay leaves, and then you may either add a combination of Italian sausage and ground beef (I use 4 lbs each for a nice, thick meat sauce) or in my case, I'm going to can most of the tomato sauce as is and then 1/4 of it will be combined with Italian sausage and ground beef to make a meat sauce for my lasagna and the tomato sauce will be canned as is alone for future use in recipes because not everything I cook will require a meat sauce.
It has a nice heat in the back of your throat, I'd say this is a medium heat with both the Anaheim and creole seasoning, but I also used a really big, fat Anaheim pepper. So if you'd like it more mild, I would either eliminate the Anaheim pepper or creole seasoning, or go with a smaller Anaheim pepper.
I'm a pasty, old, white lady and can't handle the heat as much as I used to, but this to me is still pretty mild. I also used to spice things until my eyeballs were sweating, so to me this is "mild" but to many , again, it would be "medium"
Enjoy! Also, I love your feedback, if you've tried this with some additions, I'd love to hear about them!
*edited* totally forgot to tell you to take the bay leaves out before serving.
*edited* totally forgot to tell you to take the bay leaves out before serving.
Elk Chili Recipe
I made a tasty elk chili the other night using some elk steaks that Mike received after helping some good friends process meat last year. He had vacuum sealed the elk into pouches and kept it in the chest freezer. It was ridiculously tender and delicious. Without further ado, here is the recipe.
I used a crock pot, but you could also simmer in a nice soup pot on the stove. It did have a tendency to stick to the bottom of my crock pot though, so I would stir regularly if you are home to do so. I gave measurements for spices, but I almost never actually measure, just "guessimate" and taste periodically. You can always add more, but you can never remove any. So start slow and build it up until you love the taste. <3
1.5 lbs of elk meat cubed (or you can use ground elk if preferred)
12 oz can tomato paste
15.5 oz can of white chili beans
15.5 oz can of black chili beans
1 yellow onion
I tbsp chili powder (I just do it to taste, honestly)
I tsp pink Himalayan sea salt (to taste)
1 tsp onion powder (to taste)
1 tsp garlic powder (to taste)
1 tsp creole seasoning (optional to taste)
1 can diced green chilis or 1 roasted anaheim pepper (optional)
I didn't have the anaheim pepper at the time, so I just used the cajun spice I had.
Basically just toss it all into the crock pot, give it a good stir, and cook on high for 4 hours, low for 8. I think low would probably be better so as not to burn it to the pot, but I cooked it on high because I started it mid day.
I shredded some cheese and tossed a dollop of BBQ sauce into my bowl for extra flavor. It was simple, flavorful, and that elk was ridiculously tender melt in your mouth.
Enjoy!
Monday, October 23, 2017
Reflection

I would never have imagined 6 years ago that I would be living in a magical little forest with my favorite Sasquatch, and here I am. So much has changed for us both, and yet this vision always stayed the same. The house changed, multiple times, and then came back around to the one we bought. The land was everything that I ever wanted, and I do believe it's the same for Mike. He was looking in the plains because the mountain stuff always seemed unattainable.
So close! We just have to put the rest of the pieces together.
I love you, Miláček!
Sunday, October 22, 2017


Thursday, October 19, 2017
Step 2. Jumping through hoops for permits. Soil testing and drawings.
Depending on what county you live in, you may be required to do various testing before you can proceed with your projects.
Ours requires soil testing for pretty much every project. Septic, well, buildings, driveways, etc.
You have to get permits for EVERYTHING. We do have permits on file for 1 septic system and both wells have a permit through the state because wells are state level and not county. We will have to file for a new permit for the driveway, and all the crap that's in place because the previous owner again, did not.
Soil testing. This was all over the place. The first guy came out, drilled one hole and looked into it. Charged us $600 and that was it. I was told we couldn't build on the site we picked. I searched for another soil engineer. $600 to look at a drilled hole and no samples didn't help. I called and got a bid for $1800, that person comes and drills two holes and takes samples to send to a lab, except we had to pay the drilling team on top of his fees of $1800. Another larger firm in Colorado Springs quoted us $950 or so for two holes, two samples, and the report. Same as the $1800 guy, but there was no difference in what was provided. So when you need to get testing done, ask the county exactly what is required for the test to be accepted by the county and make sure that everyone provides the same services. We're basically out $600 because the guy didn't really do enough and when I asked questions about the report he gave me information which actually wasn't correct.
Same with plans. Know exactly what the county requires on your plans and make sure that every detail is on there and make sure that your house follows exactly those plans or they will reject you outright.
I thought I had everything squared away, but the reality is that I have no idea what the hell I'm doing and I had virtually nothing to work with, so months spent on paperwork and planning was wasted. It might even be worth the money to hire a person to do all of this crap for you because I'm just as confused as I was when we started, and am still flailing around trying to figure out what to do next. This time though, I have a ton of notes from the planning office and an idea of what we need, but I'm sure it's going to be one of those 6th time is the charm things.
I recommend if you are doing the project with a partner, have your partner also attend these sessions with planning department or include them on e mails with service people because they may understand information that you do not. We've been attempting to have me deal with the phone calls and administrative tasks, but then I don't understand something that he does and we lose money on the project as a result because my decision was based on knowledge that I didn't quite understand. So communication is key.
Research what is required of you. Understand the reasons behind the testing, plans, drawings, etc and make sure that everyone understands what it is exactly that you need from engineers, architects, inspectors, etc. Know that they will not remotely bend the rules. even if something is off by 1", you will have to redo everything. Be precise in your communication and execution of plans. I've wasted so much time, energy, and money by not making sure I understood the process.
Step 1. The Realtor and Finding Your Property
The beginning of our house hunting experience began with searching for properties on sites like redfin and zillow. Having never purchased a house before, I had no idea what to look for, how to figure out what was in our budget, etc.
I started looking to purchase something on my own at first, and even tried to purchase this place on my own before we eventually purchased the place, but I had trouble with financing the property due to issues with the property, but we'll get into that later.
I found a mortgage calculator or 12 online and started there. I put in what I had for down payment + income, etc etc and it spit out a dollar amount that I could afford max. That became my max price in search parameters. Once I narrowed it down to a group of properties, I wasn't sure about how to pick a realtor, so I let one of those websites just assign me one. That was an error, and actually I let it pick my second realtor as well, but I did a little bit of research on her before we actually went with her.
The first realtor was from Colorado Springs, and was great with stuff in the Springs, but knew pretty much nothing at all about rural areas. The problem we kept running into and ultimately what has made this process difficult is that if there is a trailer on the property as the main home. It can't be older than June 15, 1976 to be considered a home due to lead and asbestos use prior to that date. Our trailer is from 1971, so you can't finance this property as a residence because of that rule, even though after testing there were no harmful substances found in the trailer. We couldn't finance the property on a land loan either because of all the structures that are on the property, so eventually we had to go with owner carrying the financing until we are able to refinance when the house is built to get a traditional home loan. Even that isn't guaranteed. So it's a risk, and I was heartbroken when I couldn't put the offer in because I couldn't find financing anywhere.
So we tried again, we looked at the house again, with the new realtor. I e mailed her and explained the situation that I ran into when trying to purchase the property, and she had been through all of this before. She lives in the area, and knew all about the rules in the county, how to get around the issues with the trailers, names of all sorts of people to help get rid of the trailers, she knew what she was looking at on the property as to what was good and what was bad. She told us not to submit an offer above a certain price because we could get a property that was a completely clean slate for less and it would cost less to bring everything in than it would for us to fix up this one. We sent in a lowball offer, and were shocked that it was accepted. So find a realtor that knows the area well, living there is preferable. Have a realtor that understands what it is that you want to do with the property. Look for reviews, look for people who specialize in the type of property that you are trying to purchase. Listen carefully when he or she gives advice about the properties that you're looking at.
When you find a property, research it. The previous owner didn't get his permission slips for anything, so we're having to start from scratch even though there's a house up here that's been here for probably 30 years or so. Search county records for permits, and spent the $10 or whatever fee it costs for them to do a paper records search of the property. Know what permits are already in place. Look for the well and septic on file is applicable and KNOW what the septic is rated for as you don't want to purchase a place with a septic in place for a 1 bedroom house when you're planning to do a 3 bedroom house, and think you can keep that septic system in place. They'll shoot you down before you can blink.
What is your well rated for? household use? can you use it for livestock as well? Think about your plans for homesteading, does the county allow you to keep livestock? if so what kind? Building codes? Want to build outside the box? Make sure you can follow the county building codes.
SO much to consider when looking for a home! If you've never purchased before, how the heck do you know what to look for? So think about what you want to do with your property and make sure the place that you choose will allow those opportunities.
I started looking to purchase something on my own at first, and even tried to purchase this place on my own before we eventually purchased the place, but I had trouble with financing the property due to issues with the property, but we'll get into that later.
I found a mortgage calculator or 12 online and started there. I put in what I had for down payment + income, etc etc and it spit out a dollar amount that I could afford max. That became my max price in search parameters. Once I narrowed it down to a group of properties, I wasn't sure about how to pick a realtor, so I let one of those websites just assign me one. That was an error, and actually I let it pick my second realtor as well, but I did a little bit of research on her before we actually went with her.
The first realtor was from Colorado Springs, and was great with stuff in the Springs, but knew pretty much nothing at all about rural areas. The problem we kept running into and ultimately what has made this process difficult is that if there is a trailer on the property as the main home. It can't be older than June 15, 1976 to be considered a home due to lead and asbestos use prior to that date. Our trailer is from 1971, so you can't finance this property as a residence because of that rule, even though after testing there were no harmful substances found in the trailer. We couldn't finance the property on a land loan either because of all the structures that are on the property, so eventually we had to go with owner carrying the financing until we are able to refinance when the house is built to get a traditional home loan. Even that isn't guaranteed. So it's a risk, and I was heartbroken when I couldn't put the offer in because I couldn't find financing anywhere.
So we tried again, we looked at the house again, with the new realtor. I e mailed her and explained the situation that I ran into when trying to purchase the property, and she had been through all of this before. She lives in the area, and knew all about the rules in the county, how to get around the issues with the trailers, names of all sorts of people to help get rid of the trailers, she knew what she was looking at on the property as to what was good and what was bad. She told us not to submit an offer above a certain price because we could get a property that was a completely clean slate for less and it would cost less to bring everything in than it would for us to fix up this one. We sent in a lowball offer, and were shocked that it was accepted. So find a realtor that knows the area well, living there is preferable. Have a realtor that understands what it is that you want to do with the property. Look for reviews, look for people who specialize in the type of property that you are trying to purchase. Listen carefully when he or she gives advice about the properties that you're looking at.
When you find a property, research it. The previous owner didn't get his permission slips for anything, so we're having to start from scratch even though there's a house up here that's been here for probably 30 years or so. Search county records for permits, and spent the $10 or whatever fee it costs for them to do a paper records search of the property. Know what permits are already in place. Look for the well and septic on file is applicable and KNOW what the septic is rated for as you don't want to purchase a place with a septic in place for a 1 bedroom house when you're planning to do a 3 bedroom house, and think you can keep that septic system in place. They'll shoot you down before you can blink.
What is your well rated for? household use? can you use it for livestock as well? Think about your plans for homesteading, does the county allow you to keep livestock? if so what kind? Building codes? Want to build outside the box? Make sure you can follow the county building codes.
SO much to consider when looking for a home! If you've never purchased before, how the heck do you know what to look for? So think about what you want to do with your property and make sure the place that you choose will allow those opportunities.
Wednesday, October 18, 2017
Mission Statement?
Having never had a mission statement, I'm not sure what one is really. I'm assuming you state what your end game is. Your goal. Your ultimate mission.
Our aim is to inform via our experiences. While researching homes and properties and planning for this adventure, there was a lot of information on how to physically do a whole plethora of things, but not as much info on materials, costs, pitfalls, expectations, reality. It would be nice to just put the information out there for others to use as they will. Neither of us is an expert in anything. I have zero knowledge and skills coming into this, so I'm a clean slate. I am even new to keeping records of anything. So bear with us as we stumble along on our journey. We are still at the beginning, and so if you are reading this, then you are beginning with us.
Welcome.
The dream:
A homestead. A working property. We work the land, and we use our skills to earn our living. We sustain ourselves with the efforts that we are putting into this. We build a home for our families to love and enjoy long after we're gone. A sanctuary for our treasured ones. This is our goal. This is our dream.
The reality:
We're off to a slower start than we'd like. We've had setbacks and delays. We've also had small victories, new discoveries, new skills learned, and we're moving ahead in leaps and bounds. We're waiting for one piece of information to move forward with new plans and drawings. The kit is paid for, but we are waiting on test results from the soil sample so that we can pass along all of our info to the engineer for the correct plans. Once all of these things are in place, we can start moving ahead with the physical work.
In the meantime we have been doing some prep work for both building and the upcoming winter season. We have been doing property maintenance to catch up on a year or so of neglect. That adds up to a ton of stuff in a hurry when you're in the woods!
We've made some fixes and upgrades in the current residence. So we have progress, but not quite the progress we had expected at this point.
So now we wait, and in the meantime I will begin to share our adventures with you here, on Facebook, and hopefully soon on YouTube.
Our aim is to inform via our experiences. While researching homes and properties and planning for this adventure, there was a lot of information on how to physically do a whole plethora of things, but not as much info on materials, costs, pitfalls, expectations, reality. It would be nice to just put the information out there for others to use as they will. Neither of us is an expert in anything. I have zero knowledge and skills coming into this, so I'm a clean slate. I am even new to keeping records of anything. So bear with us as we stumble along on our journey. We are still at the beginning, and so if you are reading this, then you are beginning with us.
Welcome.
The dream:
A homestead. A working property. We work the land, and we use our skills to earn our living. We sustain ourselves with the efforts that we are putting into this. We build a home for our families to love and enjoy long after we're gone. A sanctuary for our treasured ones. This is our goal. This is our dream.
The reality:
We're off to a slower start than we'd like. We've had setbacks and delays. We've also had small victories, new discoveries, new skills learned, and we're moving ahead in leaps and bounds. We're waiting for one piece of information to move forward with new plans and drawings. The kit is paid for, but we are waiting on test results from the soil sample so that we can pass along all of our info to the engineer for the correct plans. Once all of these things are in place, we can start moving ahead with the physical work.
In the meantime we have been doing some prep work for both building and the upcoming winter season. We have been doing property maintenance to catch up on a year or so of neglect. That adds up to a ton of stuff in a hurry when you're in the woods!
We've made some fixes and upgrades in the current residence. So we have progress, but not quite the progress we had expected at this point.
So now we wait, and in the meantime I will begin to share our adventures with you here, on Facebook, and hopefully soon on YouTube.
Wednesday, March 15, 2017
Objective completed.
We have purchased a parcel of land in a small town in Colorado, and we closed on it yesterday. It is my intention that we document our journey from purchase to completion.... if a project is ever really completed. We are planning to purchase an arched cabin, which we will pay to have roughed in. We will then finish the exterior and interior with help from beloved friends and family I'm sure. We are starting with land purchased which already had a few structures and items strewn about the property.
We will have to do some cleanup of the building that will temporarily house us while we build our happy little cabin.
I take it as a good omen that while we were standing on the build site last night, watching the sun go down behind the mountain, and the sky turn purple and pink, we heard the haunting cries of the wolves at the sanctuary howling on the wind. <3
Without further ado, I give you the grand tour of what is currently on the property.


We have purchased a parcel of land in a small town in Colorado, and we closed on it yesterday. It is my intention that we document our journey from purchase to completion.... if a project is ever really completed. We are planning to purchase an arched cabin, which we will pay to have roughed in. We will then finish the exterior and interior with help from beloved friends and family I'm sure. We are starting with land purchased which already had a few structures and items strewn about the property.
We will have to do some cleanup of the building that will temporarily house us while we build our happy little cabin.
I take it as a good omen that while we were standing on the build site last night, watching the sun go down behind the mountain, and the sky turn purple and pink, we heard the haunting cries of the wolves at the sanctuary howling on the wind. <3
Without further ado, I give you the grand tour of what is currently on the property.

This is the modified single wide that is currently on the property. In order to refinance we will have to demolish this house. For now, we are going to clean it up and live in it temporarily until we finish building our primary residence. AKA "The Ranger Station"
We may rebuild the ranger station with a trailer that falls within the required guidelines.

One of the new neighbors came to check out who was moving in.

Another photo of the new neighbor. Or I guess we are the new neighbors. Our plan is to not intrude on their natural path through the land. We have seen over the winter where their main traffic areas are, and it appeared the previous homeowner had taken care to take into account what their traffic patterns were before planning to put the location of the build site where it is. We plan to set up cameras to track their movements for awhile.

Sunset from the build site last night.

Key to the new house!

Trees in the area of well #2

My eldest child, myself, and Papa Bear aka Miláček.

New neighbor by the existing house.

More of the mule deer

Mule Deer <3

Miláček on the build site, watching the sun set.

A little golden hour light from the site of the existing house

2 of the several sheds that are around the property.

Sheds + soon to be homeowner (taken the first time we viewed the property)

Shipping container, shed, + dog house.

Miláček on the build site

Build Site

Driveway

Sign at the front gate <3

Front gate and driveway

one of the few trailers on the property

kitchen of existing house

kitchen of existing house

hallway in existing house

bedroom of existing house

living room of existing house

living room of existing house

another trailer on the property

one of the trailers on the property

mud room of existing house

kitchen area of existing house

Wood stove

weird room 1 in the house blocked off from the rest of the place and with a whole lot of outlets

weird room 1

weird room A

hallway

Laundry area

FBI Van room

The Ranger Station

View from the Ranger Station

There are steps going down to this area. We suspect that he meant to put a pond there. We may go ahead and finish that.

We weren't sure if there even was a second well based on records we found. It was all quite confusing. I found the well casing last night, and Mike (miláček) found the cover for the concrete thing that housed the pressure tank and some other stuff that I have no clue about yet.

Some stuff inside of that concrete stuff. Mike calls them "well controls"

more inside that thing.

Build site after we closed on the place

On the build site after we closed! SO excited!
Subscribe to:
Posts (Atom)